Projectors are a matter of the norm when it comes to enjoying the night outdoors with your friends. If you want to enjoy a movie on a large screen but don’t want to spend money on expensive home projector, you need not worry. If you are not bothered by any financial investment yet want to minimize the power cost to a great extent, I would recommend you build your own projector.
I am here to tell you how to do it yourself without even spending any money. Therefore, for this reason, you would need some important equipment that can help you through this process.
To save your day, I have come up with a comprehensive guide on how to project a laptop screen on the wall without a projector. So, let’s get in for more.
Why do you want to project your laptop screen?
With smartphones and tablets, this is becoming easier than ever to see the screen of the device you’re working on. But the problem with projecting your laptop screen into the room is that the image doesn’t match up with the real-world scale of the room and the objects in it. And that’s why you don’t want to project your screen onto any wall. A projector screen is a perfect solution for this.
Alternatives You Can Use for Projectors
While you do not want to invest in an expensive projector, there is always a DIY option available. Hence, with important equipment at hand and knowing the right techniques, you can absolutely do it yourself with absolute ease and convenience.
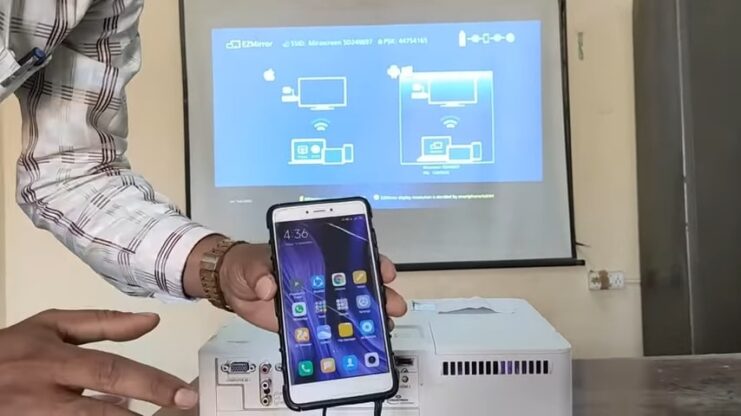
The most commonly used method is to use a smartphone or device and place it inside the container, so you can ideally use it to watch a movie on the wall.
Projecting Laptop Screen to the Wall
Now that technology has advanced to a level that a smartphone is much more than just a device to pick and receive calls. Hence, you can easily use these smart devices like a projector; however, it is important to know that it doesn’t have an in-built projector system that can project images into the wall. For this purpose, you will need the following;
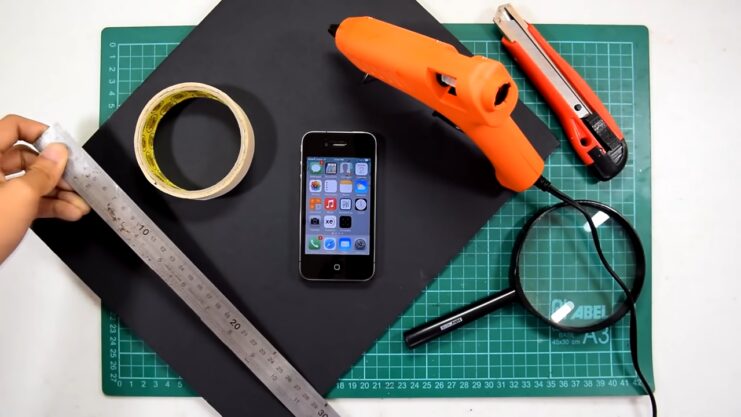
- A knife or scissors to cut the box
- A container or box with which you will make a projector
- A mirror and a magnifying glass
- Basic stationery to help trace the object
- A tape, bushes, and glue to help paste the mirror
- A shoebox or any container to build your projector
- A thick black paper or paint
Step # 1: Checking the Size
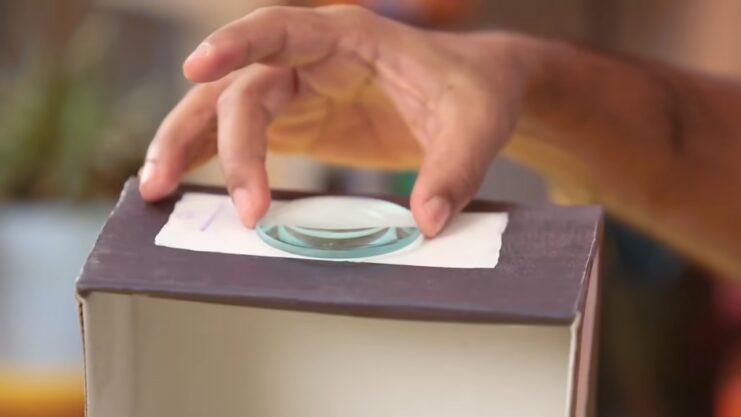
The first and foremost thing to consider here is to check the size of the box you most probably be using. Here, make sure that it is compatible with the phone or smart device you are going to use. From the magnifying glass, you will pass the light source from the box through this glass.
Now, once you are done getting the right size, place the lens in the middle of the container and replicate the shape using this pencil. This step will help you in getting the right and adjustable focus for your projector setup. Now, if you like brighter images, I would recommend you place the source where it can pass more light rays.
Step # 2: Adjust the Light
Once you are done placing the source in the box, it is the step when you adjust the light within the box. For this, you will have to cut the knife from a corner and make sure that it doesn’t damage the walls. Here, you will have to glue the paper to adjust the overall light in the container. Another thing you can do is to use paint (preferably a black one) that can help you in making the light source more prominent.
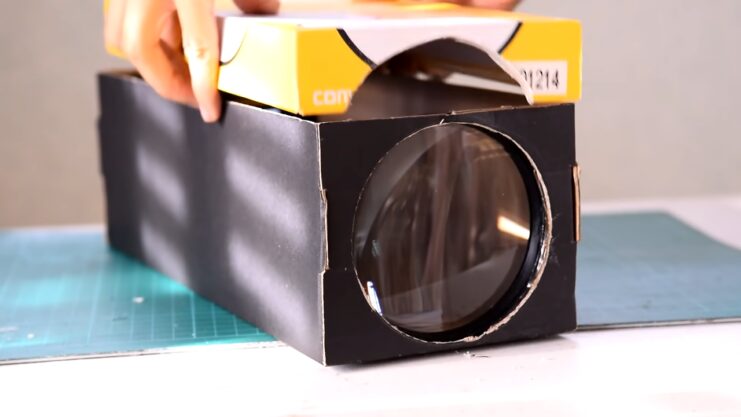
Step # 3: Add a Lens and Make a Hole
Now that you have drawn the lens on the paper, you can use the lens of the same size and project the picture there properly. Here, you will adjust it as per your screen. Here, you will have to cut the box in the same direction as your mobile is placed. Make sure that the box doesn’t have any shiny material in between that can create an interruption.
Step # 4: Make Some Adjustments and Set the Device
Now that your projector is all set, you will have to adjust the details. If you are using a large container such as a shoebox, you will have to cut some boundary, so that the magnifying glass looks clear. Later on, once everything is done, you will have to place your device in the box. Finally, you are done and start watching the movie with a crisp experience on your wall. However, always make sure that you have set the image directory as otherwise, you will be left with an inverted and upside-down image.
Frequently Asked Questions
Can we project laptop screens on the wall?
Yes, we can absolutely project an image on the wall by using a laptop. For this purpose, you would need a VGA cable and USB cable.
Once you have connected the laptop with this cable, it is recommended that you restart the laptop. Now, connect the other end of your laptop with an Ethernet cable to make the process smooth and secure. Finally, you are done projecting the laptop on the screen.
What are the alternatives we can use for a projector?
There are several alternatives to projectors that can be used for displaying content in a larger format. Here are a few options:
- Large format displays: These are flat panel displays that can be as large as a projector screen. They can be wall-mounted or placed on a stand and can display high-quality images.
- Interactive whiteboards: These are touch-sensitive displays that can be used for presentations and collaboration. They are particularly useful in educational and business settings.
- LED walls: These are modular LED displays that can be used to create large, seamless video walls. They are often used in concerts, events, and in digital signage.
- Smart TVs: These are TVs that are connected to the internet and can display content from streaming services like Netflix, Hulu, and Amazon Prime. They can also be used to mirror the screen of a smartphone or laptop.
- Portable screens: These are lightweight screens that can be set up easily and can be used in outdoor settings. They are particularly useful for movie nights and outdoor events.
- Laser TVs: These are TVs that use laser technology to create brighter and more vibrant images. They can be used in both bright and dark rooms and can be a good alternative to projectors.
Overall, the choice of an alternative to a projector depends on the specific needs and requirements of the user.
Is there any app that can turn your phone into a projector?
Yes, there are a number of ways you can use your phone in a projector. For this purpose, one of the most popular alternatives is Epson iProjection that is quite easy and comfortable to use. Hence, with this app, you can connect your Android phone and move it around the home with absolute ease.
Can I use any size box to create a DIY projector?
No, the size of the box should be compatible with the phone or smart device you are going to use. The magnifying glass will pass the light source from the box through the lens, so the size and shape of the lens should also be replicated on the box.
Is it necessary to use a magnifying glass for a DIY projector?
Yes, a magnifying glass is necessary for a DIY projector. It acts as a lens that focuses the light from the phone onto the wall, creating a larger image.
Can I use a smartphone as a projector without any additional equipment?
No, a smartphone doesn’t have an in-built projector system that can project images onto the wall. However, there are several apps available that can turn your phone into a projector with the help of additional equipment like a mini projector or a cable.
Is it possible to project a laptop screen onto the wall without a projector?
Yes, it is possible to project a laptop screen onto the wall without a projector. For this purpose, you would need a VGA cable and USB cable to connect your laptop to the wall. You can also use a DIY projector to project your laptop screen onto the wall.
What are the advantages of using a DIY projector?
A DIY projector is a low-cost alternative to a traditional projector. It is also portable and can be made from materials that are easily available at home. A DIY projector is a great way to enjoy movies or presentations on a larger screen without spending a lot of money.
What are the disadvantages?
A DIY projector may not produce the same image quality as a traditional projector. It also requires some technical knowledge to build and set up the projector correctly. Additionally, the DIY projector may not be as durable as a commercial projector, and the image may be affected by ambient light.
Conclusion
In conclusion, The projector is an interesting device that creates images on a screen by projecting light onto a surface. The projector is an amazing device for creating presentations, which is why it is very useful for business professionals.
But, it is also heavy, has a large size, and has a high price tag. The Laptop Screen Projector is an interesting device that creates images on a wall by projecting light onto a surface.
The projector is an amazing device for creating presentations, which is why it is very useful for business professionals. But, it is also light, has a small size, and has a low price tag. This projector can project a picture on a wall without using a projector.